SSL Certificate in FLYWHEEL

Posted on 1 CommentPosted in Uncategorized

SSL Certificate in FLYWHEEL

Go to your flywheel control panel. There you can see the box in your left-hand top of the corner saying ADD SCREEN, click it and select AUTOMATIC SCREEN SHOT.

In flywheel control panel, click ADDONS

Then click ADD SSL button Select SSL type. In here you can choose SIMPLE SSL type its free and click CONFIGURE SSL button (you can find this button right bottom side in the page).

Then you can see the SETUP FORM.

You have to provide information that they ask. It is called SSL CERTIFICATION INFORMATION.

Fill that form with your information.

After click COMPLE SSL SETUP.

Click DONE VERYFY MY DOMIN.

You can see your website screen shot working fine.

Click ADDON again and you can see the massage INSTALLATION IN PROGRESS. Wait for few minutes.

After few minutes you can see SSL is active.

Then go to your website and refresh it with http:// then you can see it in green and showing secure.

Go to your front-end your website and in there you cannot see the secure but it is ok. That’s mean there are some issue which are not running with http://

Next thing is you need to do is go to your Flywheel control panel and click ADVANCED. In there you have to switch on FORCE HTTPS and wait for minute.

After refresh all the pages in Flywheel control panel.

Now you can see the green tick next over your screen shot.

Come back to your website front page and refresh it.

It will work successfully.

Content Management Systems

Posted on 1 CommentPosted in Uncategorized

What is the content management system?(CMS)

Content management system is a software application that can be used to manage the creation and modification of digital content on a website without the need for specialized technical knowledge. CMS s are typically used for

  • Enterprise content management (ECM)
  • Web content management (WCM)

WCM is the collaborative authoring for websites and may include text and embed graphics, photos, video, audio, maps and program code that display content and interact with the user. ECM typically includes a WCM function.

A (CMS) typically has two major components: a content management application (CMA), as the front-end user interface that allows a user, even with limited expertise, to add, modify, and remove content from a website without the intervention of a webmaster and a content delivery application (CDA), that compiles the content and updates the website.

Instead of building your own system for creating web pages, storing images, and other functions, the content management system handles all that basic infrastructure stuff for you so that you can focus on more forward-facing parts of your website.

Beyond websites, you can also find content management systems for other functions – like document management.

How Does a Content Management System Work?

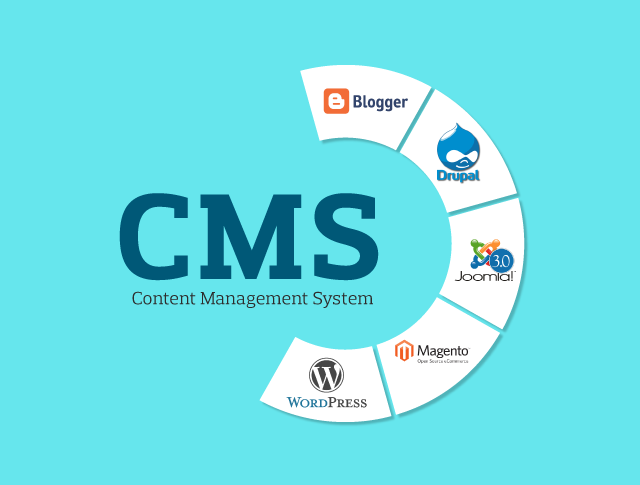
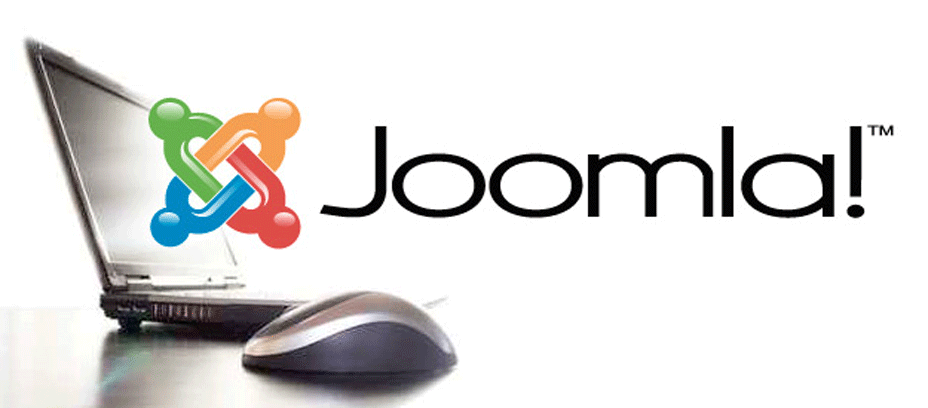
 WordPress interface is a good example to get an idea of how a content management system works, (WordPress is a good example of a content management system).

Content management system like WordPress, you can just write your content in an interface that looks a good bit like Microsoft word. If you want to upload and manage media, like images and videos you can just browse the media library instead of actual interact with your web server directly.

The content management system not only a back-end management interface, though but also front-end interface that is mean it will make all of the content that you create visible to your visitors.

What Makes up a Content Management System?


On a more technical level, a content management system is made up of two core parts:

  • A content management application (CMA)– this is the part that allows a user, even with limited expertise, to add, modify and remove content from a website without the intervention of site admin.
  • A content delivery application (CDA)– this is the back-end, behind-the-scenes process that takes the content you input in the CMA, stores it properly, and makes it visible to your visitors.

With these two systems make it easy to maintain your website.

What Are Examples of Popular Content Management Systems?

 WordPress is the best example of a popular content management system. While there are certainly other content management systems in existence, WordPress maintains over a 35.2% market share on websites with a known content management system.

Note that when we mention “WordPress”, we’re not talking about WordPress.com. Instead, we’re focused on WordPress.org, which is the website where the actual open-source WordPress content management system is stored.

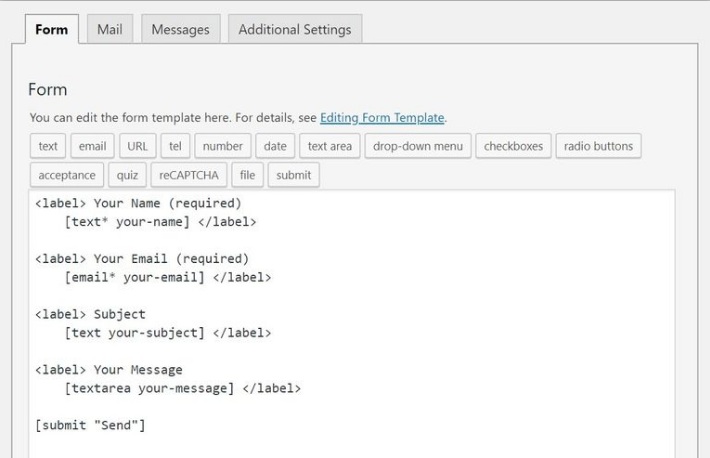
Beyond the self-hosted WordPress software, other popular content management systems include:

Joomla

Drupal

Magento (for eCommerce stores)

Squarespace

Wix

TYPO3

There are also lots of other unpopular content management systems that target themselves to large enterprises (with an expensive price point to match).

What Kinds of Websites Can You Build with Those Content Management Systems?

Most content management systems are pretty flexible nowadays. While there are some that focus on a specific use – like Magento and eCommerce – most of the popular content management systems can be used to create essentially any type of website.

For example, you can use WordPress to power:

  • Static websites
  • Blogs
  • eCommerce stores
  • Forums
  • Social networks
  • Online courses
  • Membership sites
  • Portfolios

Etc.

What Is the Best CMS Platform?

Sure, everyone’s got their answer, but it’s difficult to come up with a factual argument for one content management system being the best in 100% of situations.

What we can do, though, is return to the numbers and make a suggestion that there’s a reason WordPress has such a dominant share of the content management system market:

For most types of websites, it provides the most user-friendly, flexible solution. It’s not always the best option, but it is the best option most of the time.

How to Build a Website with a Content Management System

Want to build your own website with a content management system? If so, the general process looks something like this:

  • Purchase web hosting and a domain name
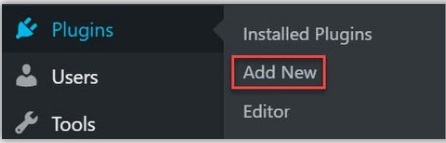
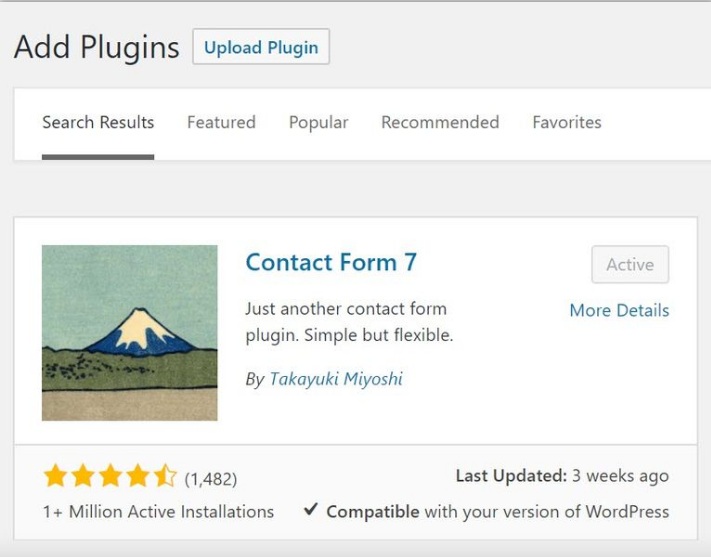
  • Install your content management system of choice on your web server
  • Configure the content management system to dictate how your site looks and functions

Start writing content using the content management system’s interface

It’s actually surprisingly simple.


Page Builder by SiteOrigin

Posted on Posted in Uncategorized

Page Builder by SiteOrigin

Page Builder by SiteOrigin makes it easy to build responsive grid-based page content that adapts to mobile devices with pixel perfect accuracy. It’s a whole new dimension to content creation that’ll help you create your home, contact, about us or any other page where a linear layout won’t convey your message. It’s a powerful enhancement to the WordPress content editing experience, yet it feels entirely familiar.

Page Builder works with standard WordPress widgets, so you’ll always find the widget you need. We’ve created the SiteOrigin Widgets Bundle to give you all the most common widgets, and with a world of plugins out there, you’ll always find the widget you need.

You can choose any type of WordPress theme that you like It’s not a commitment to a single theme or theme developer.

Page Builder’s simple drag and drop interface means you’ll never need to write a single line of code. Page Builder generates all the highly efficient code for you.

Page Builder supports live editing. This tool lets you see your content and edit widgets in real-time. It’s the fastest way to adjust your content quickly and easily.

How to install Page Builder by SiteOrigin

Go to your WordPress dashboard and select plugins then select add new and type Page Builder by SiteOrigin into the search, Once the Page Builder by SiteOrigin plugin is displayed, click Install > Activate.

How Page Builder by SiteOrigin is working

Go to page that you want to add Page Builder by SiteOrigin then click Add Row. In this penal you can Set row layout as well as Row styles and then hit insert.

Select the row and click Add Widget. In the widget penal you should select Visual Editor.

Click edit in the Visual Editor.

HISTORY BROWSER.

This tool lets you roll forward and back through your changes. It gives you the freedom to experiment with different layouts and content without the fear of breaking your content.

ROW AND WIDGET STYLES.

Row and widget styles give you all the control you need to make your content uniquely your own. Change attributes like paddings, background colours and column spacing. You can also enter custom CSS and CSS classes if you need even finer grained control.

IT’S FREE, AND ALWAYS WILL BE.

Page Builder is our commitment to the democratization of content creation. Like WordPress, Page Builder is, and always will be free. We’ll continue supporting and developing it for many years to come. It’ll only get better from here.

We offer free support on the SiteOrigin support forums.

ACTIVELY DEVELOPED

Page Builder is actively developed with new features and exciting enhancements all the time. Keep track on the Page Builder GitHub repository.

Read the Page Builder developer docs if you’d like to develop for Page Builder.

AVAILABLE IN 17 LANGUAGES

Through the efforts of both professional translators and our community, Page Builder is available in the following languages: Afrikaans, Bulgarian, Chinese (simplified), Danish, Dutch, English, Finnish, French, German, Hindi, Italian, Japanese, Polish, Portuguese (BR), Russian, Spanish and Swedish.

More Information https://siteorigin.com/page-builder/documentation/

https://wordpress.org/plugins/siteorigin-panels/

https://siteorigin.com/page-builder/


WAMP SERVER FILE SIZE

Posted on Posted in Uncategorized


When we work with WordPress in localhost WAMP server, there are few common errors that can be occurred, when we are going to upload some large files.you can do that by updating your “php.ini ”.

WAMP server already setup maximum upload file size as a 2M.But all users need to upload file size more than 2M. If you are trying to upload file size more than 2M you can see error message as below

Error text: file_name” has failed to upload due to an error – This file exceeds the maximum upload size for this site.

How to fix the Maximum upload size exceeded” Error

 I need to increase my maximum upload file size up to 32MB

  • Click your WAMP server icon in the right bottom of your computer that is showing green icon.
  • You should click it once.
  • Go to the PHP folder icon in the drop down menu and in the drop down menu select “php.ini ” and click it.
  • When you clicked “php.ini ”, the file will open in your default text editor (notepad)
  • You need to search (if windows user Ctrl+f shortcut for search).
  • Post_max
  • Upload_max
  • And change the 2M to 32M. Save the file after that close the notepad text editor (do not forget to save).
  • Finally go to WAMP server icon and click once and click “restart all Services”.

WHAT IS WORDPRESS

Posted on Posted in Uncategorized

What is WordPress


WorPress is most popular and attractive open source content management system which is written in PHP and MySQL. It has become the most powerful content management system in the world today. WordPress is used by more than 75 million websites in the world and which is equivalent to more than 25% of the world’s websites.

Why should I use WordPress?

WordPress is 100% free and open-source platform, which means anyone, can   download, install, use and modify. Source code of the platform is available free for anyone to study, understand modify and create new themes and plugins.

Should I have any coding skills?

It does not matter if you don’t have any programming or coding skills to build a blog or even an e-commerce site, because there are many plugins with built-in features and themes enable everyone to create their own website.

But it is worth, if you have basic knowledge of handling HTML (HyperText Markup Language),CSS (Cascading Style Sheets),PHP (Hypertext Pre-Processor) coding languages, because it will give you ultimate flexibility to handle many plugings and themes. But anyway it really does not need to have deep knowledge to handle on the basics.

 Ways to use WordPress

WordPress is flexible platform, so you can use it in many ways.

For example.

  • Blog
  • Community site
  • Celebrity website
  • Classified ads site
  • Corporate website
  • Gallery
  • Portfolio
  • Ecommerce

What is WordPress theme?

Theme decides how your site looks on the front-end, i.e. what a visitor sees when they browse to your site on the web. It means that you can decide how that content should be arranged and displayed on the front end. Themes or templates consists with options panel, so it is very easy to  change colours, font styles ,upload a logo or video , change background, use a creative slider.

Free and premium plugings can extend the flexibility of the wordpress. These plugins can add extra functions to your theme.

Is it SEO friendly?

WordPress is SEO friendly? You can use WordPress SEO plugins to improve online visibility of your website or a web page in every search engines.

Most notable big brands that are using WordPress

The New Yorker


The official site of Sweden


E bay


Sony music


BBC America


Mercedes-Benz


Easy Google fonts

Posted on Posted in Uncategorized

Easy Google fonts

A simple and easy way to add custom google fonts to any WordPress theme without coding. This plugin integrates with the WordPress Customizer so you can preview google fonts on your site in Realtime. It’s compatible with any theme.

It also allows you to create custom theme specific font controls in the admin settings area to control particular css selectors. Once created, these custom font controls are instantly available in the customizer no coding required!

FEATURES

  • This plugin allows you to take full control of your theme’s typographyin any WordPress theme (no coding required).
  • It allows you to choose from over 600+ google fontsand font variants to insert into your website without coding.
  • Allows you to preview font changes on your website in realtimeusing the WordPress Customizer.
  • Create Unlimited Custom Font Controls:Create custom font controls in the admin area that are instantly available in the Customizer preview.
  • Allows you to preview what your theme will look like with the new google fonts before you save any changes.
  • Allows you to create your own font controls and rulesin the admin area (no coding required).
  • Allows you to easily change the look of your website with the click of a button.
  • Automatically enqueues all stylesheets for your chosen google fonts.
  • Allows you to add google fonts to your theme without editing the themes main stylesheet which allows you to update your theme without losing your custom google fonts.

PLUGIN FEATURES

  • Live Customizer Preview:Preview google fonts without refreshing the page in real time right in the WordPress Customizer.
  • Over 600+ Google Fontsto choose from as well as a list of default system fonts.
  • Works with any WordPress Theme. No coding required.
  • Automatic Background Updates: Updates the google fonts list with the latest fonts automatically once.
  • Translation Ready: MO and PO files are included.
  • Seamless WordPress Integration: Uses the WordPress customizer for the live preview and has a white label admin area that looks like it is a part of WordPress.
  • Custom WordPress Customizer Control: One of a kind control only available with this plugin.

More information https://wordpress.org/plugins/easy-google-fonts/

Black Studio tiny MCE widget

Posted on Posted in Uncategorized

Black Studio tiny MCE widget

This plugin adds a new Visual Editor widget type that allows you to insert rich text and media objects in your sidebars with no hassle.
Widgets are a powerful and useful part of the WordPress administration experience. But by default WordPress doesn’t allow you to make them with the TinyMCE/Visual editing experience that you’re able to use when writing WordPress posts, pages, etc. This is fine for those of us that speak HTML, but if you’ve got a client who doesn’t just figuring out how they can bold or italicize a few words in a widget area can be a lot to ask.

BASIC FEATURES

  • Add rich text widgets to your sidebars and edit them using the TinyMCE visual editor
  • Switch between Visual mode and HTML mode (including Quicktags toolbar)
  • Insert images, videos, and other media from WordPress Media Library
  • Insert links to existing WordPress pages/posts or external resources
  • Support for shortcodes, smilies and embed in widget text (including preview)
  • Support for Customizer with live preview and quick edit
  • Support for widgets accessibility mode
  • Compatible with multi-site (WordPress networks)
  • Compatible with the most common multi-language plugins
  • Compatible with Page Builder plugin by SiteOrigin
  • Translations available in 20+ languages

ADVANCED FEATURES

These features are what makes this plugin better than the WordPress (4.8+) native widget:

  • Full featured TinyMCE Visual Editor (the same you have for pages and posts)
  • Wide text area for an enhanced editing experience
  • Compatible with 3rd party TinyMCE customization plugins (TinyMCE Advanced, WP Edit, …)
  • Support for distraction-free (fullscreen) editing mode
  • Option to “Automatically add paragraphs” to widget text

How to install Black Studio TinyMCE Widgit

  • Go to “Plugins > Add New”
  • Search for “Black Studio TinyMCE Widgit”
  • Install the plugin
  • Activate the plugin

Go drag over a “Visual Editor” widget into the sidebar of your site and get to work!

It really is a great little plugin. Does a single thing very well. Highly recommended

More information https://wordpress.org/plugins/black-studio-tinymce-widget/

Contact Form 7

Posted on Posted in Uncategorized

Contact Form 7

Contact Form 7 can manage multiple contact forms, plus you can customize the form and the mail contents flexibly with simple markup. The form supports Ajax-powered submitting, CAPTCHA, Akismet spam filtering and so on.

What are the best best features?

  • Create and manage multiple contact forms
  • Easily customize form fields
  • Use simple markup to alter mail content
  • Insert forms into any pages or posts using Short code
  • Plugin supports Akismet spam filtering, Ajax-powered submitting, and CAPTCHA
  • Lots of third-party extensions to add additional functionality

And best of all, it’s free!

How to install Contact Form 7
Go to your WordPress dashboard and select plugins then select add new and type Contact Form7 into the search, Once the Contact Form 7 plugin is displayed, click Install > Activate.

Once the plugin activated, you can find the plugins functionality in the new Contact area of your WordPress dashboard.

How to set up Contact Form 7
Click on Contact > Contact Forms. Here you will see the central administration panel where you can manage multiple contact forms. You will also find the Contact Form 7’s default contact form, labeled Contact Form 1.
Contact Form 1 contains all the fields a basic contact form may need. Or you can create your own contact form by selecting Contact > Add New.

Creating a new contact form
first you should give a name for the new contact form and then you can edit the new contact form template.
there are number of fields have add from the default Contact Form7 to new forms. So, if you want to keep them or you may change them. If you want to add extra new fields, depending on your site you can add the new fields from here.

Insert a contact form into a page or post

Select Contact > Contact Forms. Then copy the short code next to the form that you want to add to your site.
Next, open the page or post where you would like to insert the contact form. Paste the short code in the text area of the post editor where you would like the contact form displayed.
Preview the page, and if you are happy with the results, click Publish. Once your contact form has gone live, test it to check it is working.

More information https://wordpress.org/plugins/contact-form-7/