SSL Certificate in FLYWHEEL
Go to your flywheel control panel. There you can see the box in your left-hand top of the corner saying ADD SCREEN, click it and select AUTOMATIC SCREEN SHOT.

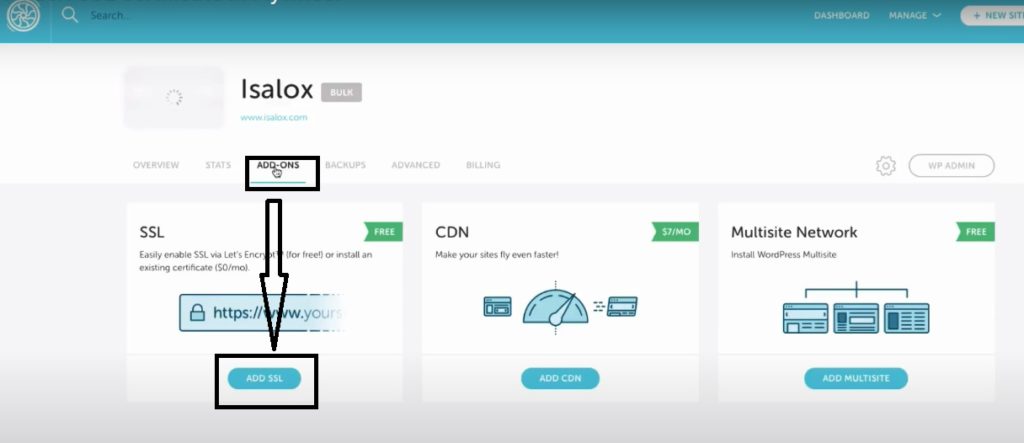
In flywheel control panel, click ADDONS

Then click ADD SSL button Select SSL type. In here you can choose SIMPLE SSL type its free and click CONFIGURE SSL button (you can find this button right bottom side in the page).

Then you can see the SETUP FORM.

You have to provide information that they ask. It is called SSL CERTIFICATION INFORMATION.
Fill that form with your information.
After click COMPLE SSL SETUP.
Click DONE VERYFY MY DOMIN.

You can see your website screen shot working fine.

Click ADDON again and you can see the massage INSTALLATION IN PROGRESS. Wait for few minutes.

After few minutes you can see SSL is active.

Then go to your website and refresh it with http:// then you can see it in green and showing secure.
Go to your front-end your website and in there you cannot see the secure but it is ok. That’s mean there are some issue which are not running with http://
Next thing is you need to do is go to your Flywheel control panel and click ADVANCED. In there you have to switch on FORCE HTTPS and wait for minute.

After refresh all the pages in Flywheel control panel.
Now you can see the green tick next over your screen shot.
Come back to your website front page and refresh it.
It will work successfully.


Valuable information…